This project was for a friend, and started with a ‘what if?’.
I hadn’t undertaken anything like this before, but was certainly up for this challenge. Could I make a dark, damp, muddy, cluttered space that served virtually no purpose, into a bright functional room?
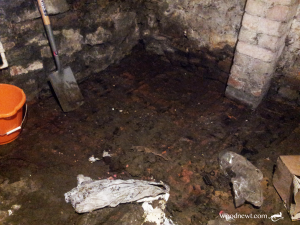
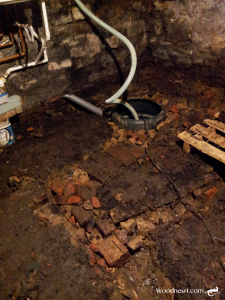
In the drier summer months the floor of the cellar was damp mud covering a brick floor. In the winter/wetter months the water pooled up to an inch deep and was only navigable by walking on pallets or other objects placed as ‘stepping stones’. The walls are permanently damp and a single naked bulb glowed in the depressed darkness.
We discussed the option of tanking the cellar, but this was quickly rejected. Although it would be an excellent solution, it was far beyond the budget available. The plan was simply to be able to make some use of the space available, not create a new room in the house.
The main problem was water. Neither of us was sure how water accumulated in the cellar, though we were aware that the cellar floor was about 5ft below ground level. Natural thought dictated that water rose up as the ground became saturated. Whatever the cause, the way to resolve the issue was to create a sump in the ground to collect the water and pump it out.
The first task was to clear out the debris, mud and an old stone bench built on two brick pedestals from the cellar floor, the space that could be liberated from this darkness became apparent.
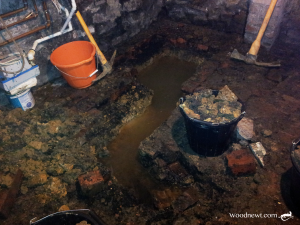
I started removing part of the brick flooring so as to sink a sump into the ground with the requirement to be able to house an electrically operated pump. We needed a sizeable sump, but purpose built plastic water tanks are very expensive.. and overly large. I sourced a 114 litre water butt to fit the bill. It had a lid and was large enough to house an inexpensive automatic drainage pump.
As I dug through the soggy surface into the clay I found that the clay was dry.. so the water was definitely not rising up through the ground. The hole that was dug however, did fill with water (slowly). Further Investigation found by taking some more bricks out, that water entered at the cellar floor level either under or through the brickwork of the walls, rather than upwards through the clay. To ensure the floor would drain of water, the sodden bricks needed taking up and drainage channels dug alongside the cellar walls, and then routed to the sump.
Through removing the stone bench and clearing the floor I noted some bricks laid as if covering a pipe, diagonally across the floor. I took these up for investigation, and found that water was draining in from the next door property at the point it came under the party wall. This source of water ingress would need addressing also, so the bricks above this pipe run were removed, locating a clay drainage pipe sunk almost 15” below the brick floor. it was set in a channel covered over with expanded foam blocks. Removal of all these bricks to the opposite wall uncovered what appeared to be an open pipe sitting directly above the drainage pipe. I dug with my hands into the rubble and mud at the opening of the pipe to investigate, at which point the water that was sitting in the cellar drained out of the cellar via the pipe I had cleared.
Things were becoming clearer. This house was the last of a terrace of five, I took a walk to the opposite end of the terrace, and there was an inspection cover to what appeared to be the same pipe. it seems that water was tracking along this pipe channel and with the pipe above the drainage pipe exiting the building having silted up over the years, the water was unable to drain quickly. and would fill the cellar. The water ingress from the base of each of the four walls exacerbated the problem somewhat.
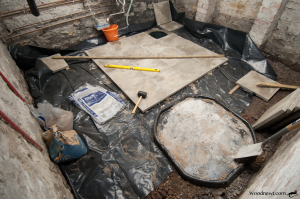
Now I understood the issue, a resolution could be offered. 1) take up all the bricks 2) dig out and level the floor 3) dig the hole for the sump, 4) dig channels along the walls 5) dig radial channels from them to the sump pit. 6) install the plastic sump (with holes drilled to allow water to enter). 7) infill channels with large hardcore allowing drainage 8) infill around the sump with large hardcore allowing water to enter 9) cover large hardcore channels with 20mm gravel 10) fit automatic float activated pump 11) lay heavy duty damp proof membrane 12) lay alternative floor.
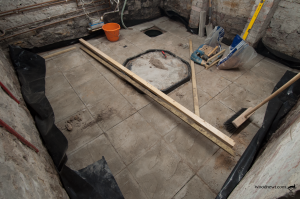
We had options for the floor. The house next door had a sump fitted a number of years ago and a decking floor installed. If installing a decking floor, we would lose about 5 inches of headroom, I suggested a concrete flag floor, essentially an indoor patio, moisture would not affect it, and additionally, we would only raise the floor about 2.5 inches. With removal of the old brick floor and some levelling of the floor before laying the concrete flags, we would gain up to a couple of inches of headroom (and be able to stand upright!).
We discussed what use the cellar would be put to, and reducing its elevated humidity and moisture levels and how that would affect usage. Sealing any ventilation is a bad idea, causing significantly more problems than one might solve. There are several air bricks serving the cellar area and the lower quarter of the walls get a little damp, so maintaining a low humidity cellar was not going to be cost effective.
Before getting to work down there, I needed more lighting, I took out the single 60 watt light fitting, replacing it with two 5ft LED battens. the stairs leading to the cellar was not lit, so I also added a pendant light fitting to serve that area, as it is nice to see where the steps are!
The pump would need power, and additional sockets would be handy. I noted that the consumer unit had a spare circuit on the RCD (Residual Current Detection) bus. so added a ring for the cellar, adding two twin gang sockets in the cellar and one at the top of the cellar steps. An electrician checked my work and wired my ring in to the consumer unit.
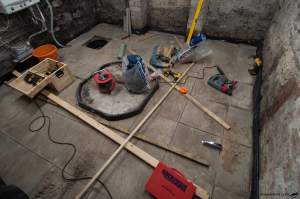
All digging and hardcore filling was completed along with the fitting of the sump. The pump was fitted bolting it to a concrete slab before lowering into the sump to ensure stability in use and allowing the float to function unhindered. the outlet pipe was routed out close to the cellar wall. The DPM was then laid, and starting from the sump, the flag floor was laid on a 6 to 1 mix of sharp sand and cement.
My friend wanted to paint the walls white to brighten it up. Unhappy with the old lime wash currently on the walls leaving powdery white marks on clothing as you brush against the walls going down the steps into the cellar. He wanted to paint the walls with a proprietary product. I did some research, as did he. My conclusion was to paint it again using lime wash. There are paints out there that claim breathability in damp conditions, but these were seriously expensive. Also, they are designed for walls that have a little damp, but the expectation for this cellar is that the walls will always be damp. After reading up on how experienced decorators viewed the proprietary paints and problems encountered, we opted to repaint the cellar with lime wash. To remove the problem of white powder marks, the walls entering the cellar (which are dry) were painted with an exterior wall paint. Some parts of the lime wash took some time to dry, but the bright white walls from just three coats is rather impressive. at about £15 for a bag of hydrated lime to do the job, painting the walls would have been about 7 times the cost. Lime washed walls only become powdery with age, so a single re-coat every five years should keep it in check.
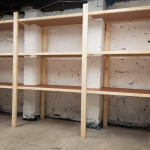
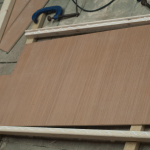
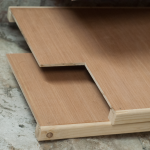
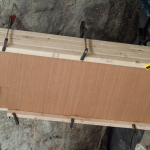
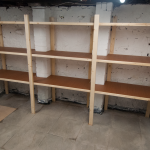
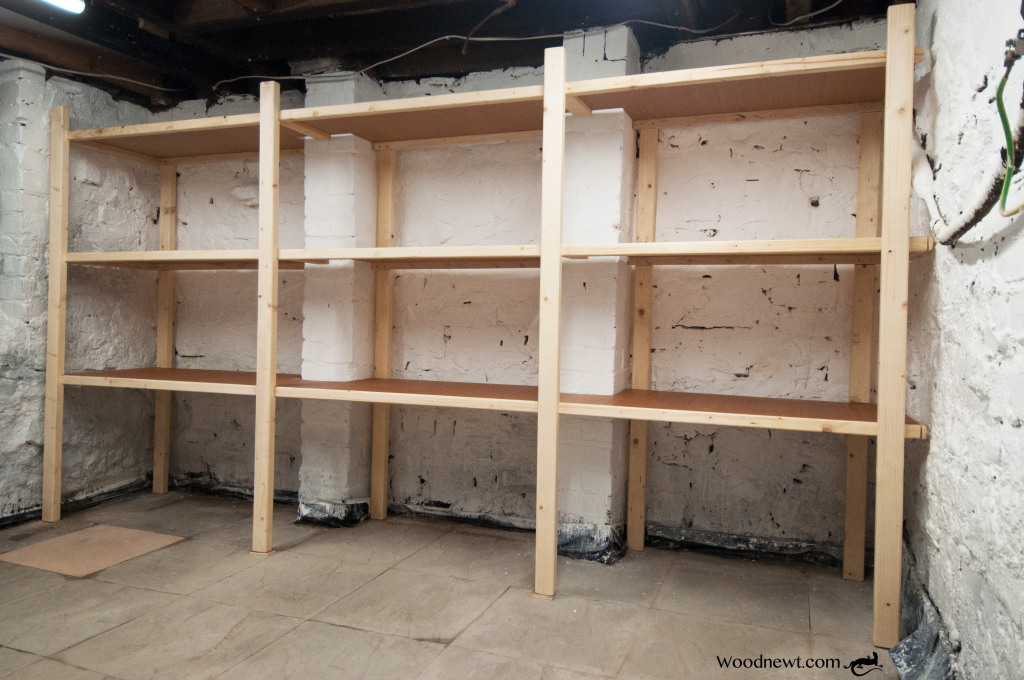
With the floor down, pump working like a dream and the walls painted, I could design and build the shelving system. Using 9mm hardwood faced ply rebated into nine frames manufactured from CLS (Canadian Lumber Standard) timber these were joined in sets of three with cutouts to fit around the chimney breast foundation. these are then supported by and fixed to ten 3”x 2” CLS posts, notched to accept the shelving, giving improved load bearing ability. Prior to assembly they were painted with a water based satin varnish. When in position, the racking was secured to the wall with six brackets.
The hatch covering the sump is made from 18mm hardwood faced plywood.
On completion, the feel of the cellar is bright and airy, it feels dry and smells fresh. The floor is solid and level and headroom has improved. The space is now served with extra lighting and has power sockets enabling a spot of DIY/hobby work down there. The wall of shelving allows other rooms in the house to be cleared of rarely used items, allowing the household to function with more space.
A great result!!
